
Restringing Vintage Muscle Body G.I. Joes
Here is a quick and dirty method of restringing Muscle Body G.I. Joes without having to buy a kit, with all stuff you can buy from your local Walmart.
If you are looking for how to restring the regular Vintage G.I. Joe, go here.
Step 1: Gather Joe Pieces.
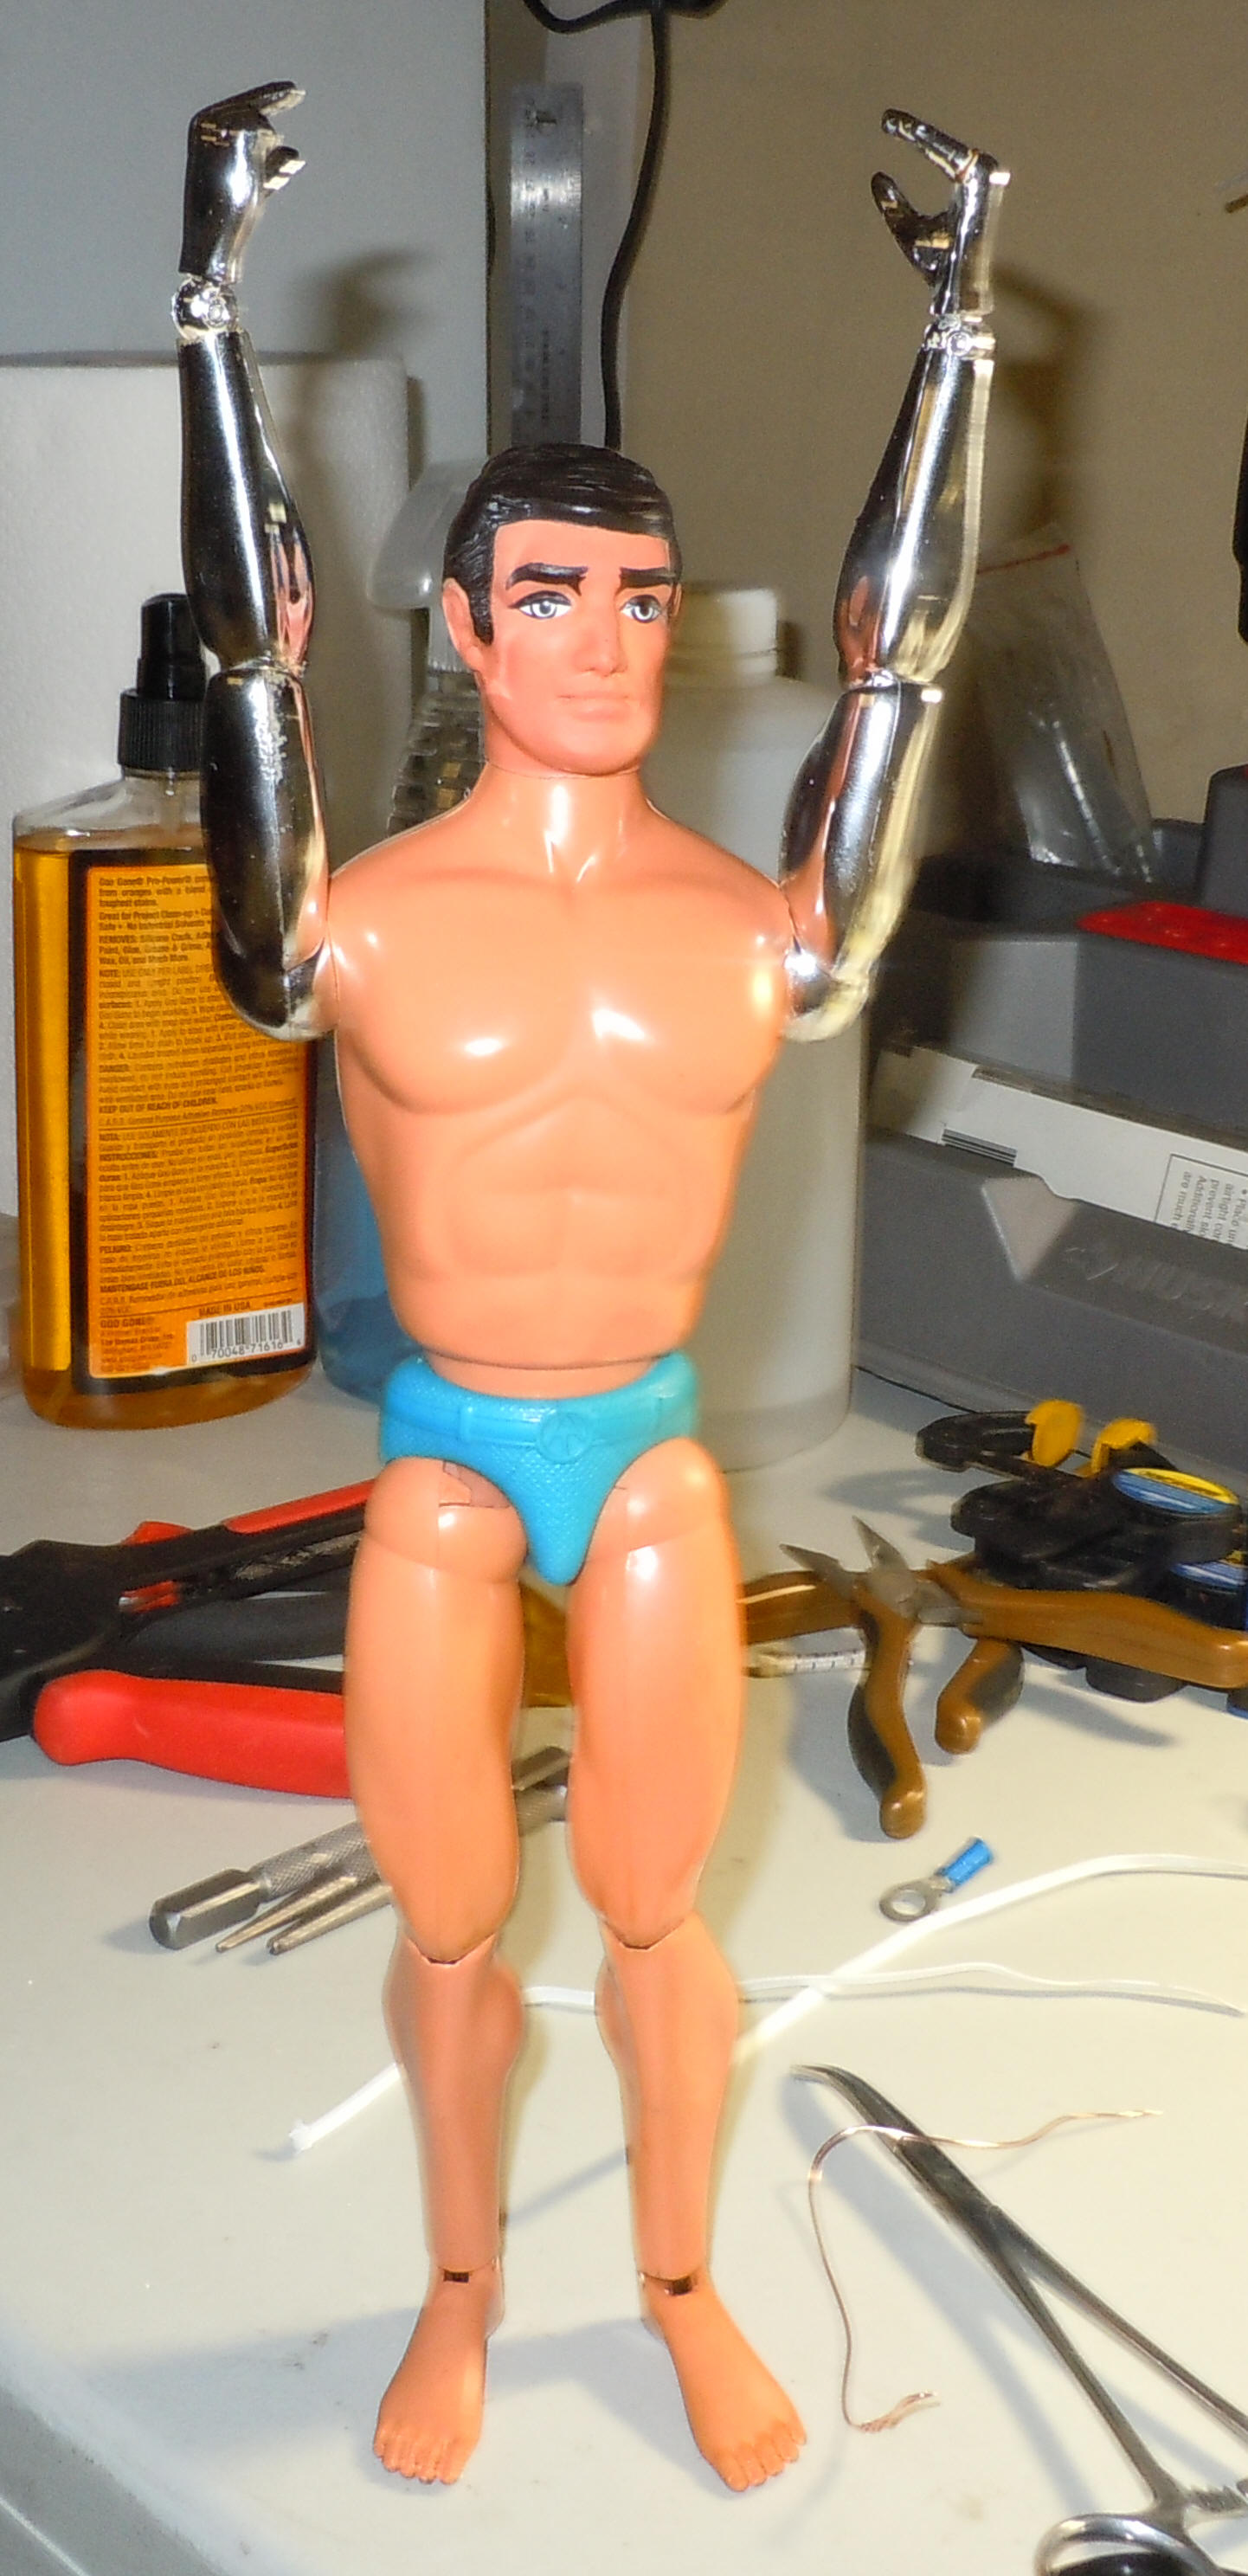
This should be pretty easy as he probably fell apart and you are thinking, "now what?" Or, quite possibly you got him in this condition and you are making sure you have what you need. This is what a typical Muscle Body G.I. Joe looks like if he has not been restrung, with his head already removed from the neck post. Actually, this is not probably what the typical Joe looks like because this one has all the pieces, all the fingers, no terrible melt marks, magic marker, dart holes, BB Gun divots, burn marks, teeth imprints, or any of those other typical things. An above average figure will look something like this. The legs are generally attached to the hips and the torso. The arms have separated into two pieces each, and the neck post (top piece in the picture) is usually stuck in the head. To remove it, I use a thin blade flat-head screw driver and slowly pry around the edge until it comes off.
Step 2: Gather Your Tools and Materials
There are quite a few great options for rebuild kits for Muscle Bodies and if you have a truly pristine, truly sentimental Joe, or one that you want to pose in all the original glory of a new one, I'd recommend using one of those kits. If you just want his arms and head attached so you can remember him fondly and pose him in limited ways, this is a lot cheaper and less scary because it does not involve the breaking apart of any parts. The kits all require separating the torso front and back (breaking pegs inside), separating the biceps (breaking pegs inside) and then carefully supergluing those parts back together. The way I'll show you requires no breaking. If you already removed the head, all the rest is putting together.
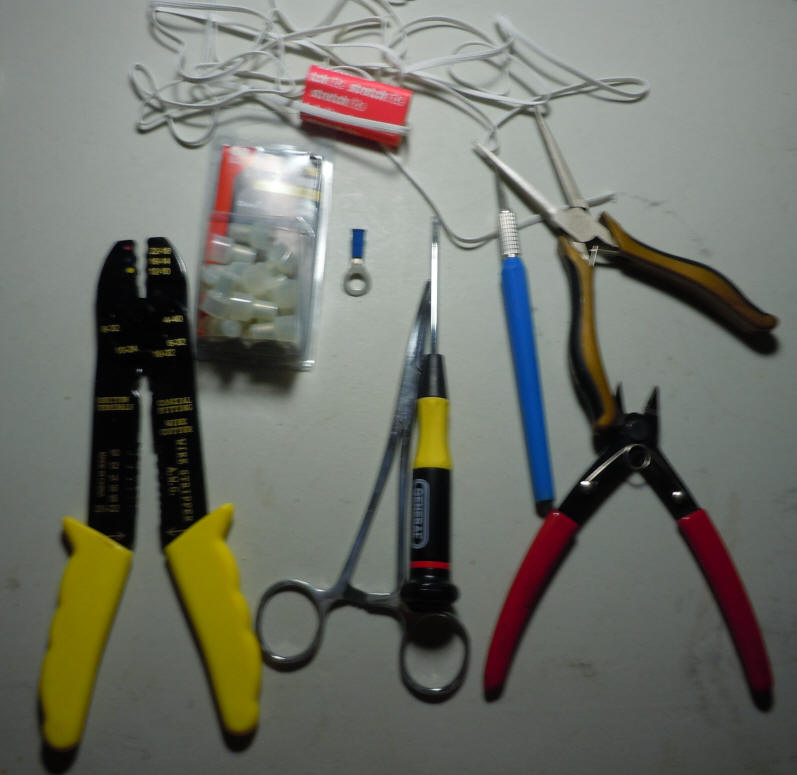
These are the tools I used for the procedure I documented here.
1. Elastic cord (flat or round). I prefer flat because it lays better in the elbow joint and is less likely bind up. You can purchase this in the craft section at your local Walmart or craft store.
2. Some cutters or scissors (or both).
3. Needle nose pliers with long and thin nose.
4. Small flat tip screwdriver.
5. Forceps or hemostats, or some other locking pliers (or a second person to help).
6. Some sort of large gauge wire crimper or similar device that you can crush to hold a bundle of the elastic cord together. I use the heavy gauge cap ones shown and cut the plastic off, just using the metal crush ring inside.
7. Crimp tool that goes with whatever you chose in step 6. Regular pliers could work, I suppose, but why waste a chance to have another tool?
8. Some metal wire, something sturdy and without insulation. I use magnet wire that I bought at my local Radio Shack. You just need something sturdy and stiff that you can push through small places and pull back out with the cords.
9. A dose of patience for your first time and maybe some Band-aids if you're even a little clutzy. If you have really bad luck, you might want to wear safety goggles. Actually, everyone should wear safety goggles because you're dealing with sharp objects and things under tension.
Step 3: Thread the Bicep
Take a piece of your threading wire (#8 above) about 10 inches long. Push it through the top portion of the bicep, the end with the slot, and jiggle and cuss at it until it pokes through the bottom side that has a square hole. I like to bend the top piece so I don't accidentally pull it all the way through.
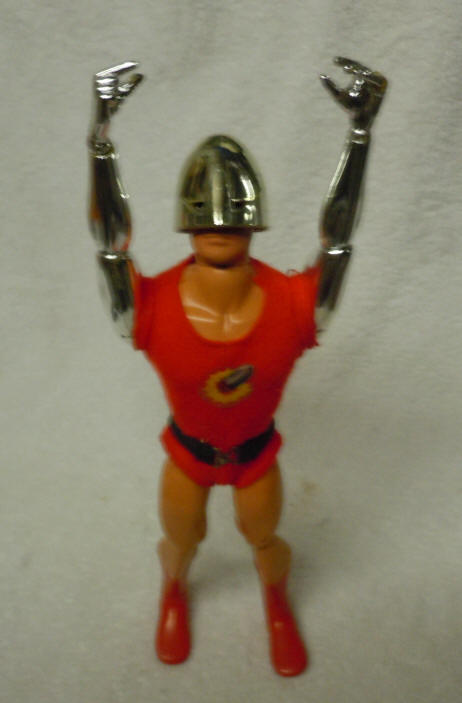
NOTE: I switched figures on you. I documented the repair of a Bulletman figure which has Muscle Body arms in chrome plate with vintage hard hands. Rebuild is the same, just don't freak out that your guy isn't chrome.
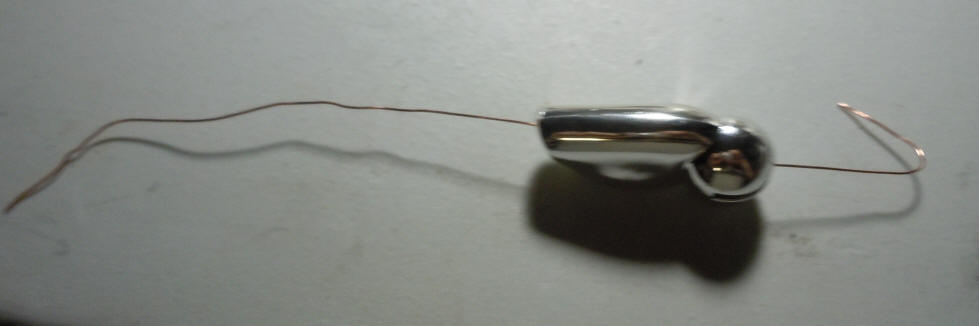
Step 4: Thread the Forearm
Cut a piece of your elastic cord about twice 16 inches long (on your first one, you'll use less later on if you do many). Thread that through the slot on the forearm and under the rivet that runs across. I use the tip of my Exacto knife or some other narrow object to pull the running end out after I press it through the side. The end result should be the elastic cord looped over the rivet and both ends of it hanging out of the end of the forearm as in the pictures below.
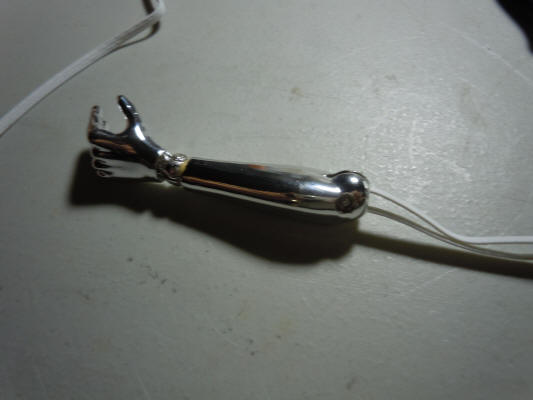
Step 5: Thread the Elastic Through Your Wire
I make a small loop by twisting the wire at the end that comes out of the bottom (square hole side) of the bicep. Run both running ends of the elastic cord through the wire loop as you see in the picture, and pull most of the elastic cord through.
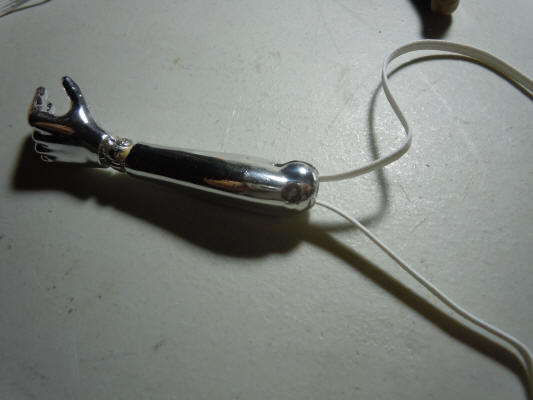
Step 6: Thread the Elastic Through the Bicep
Grab the other end of the wire and pull carefully through the bicep. Make sure that you pull until both running ends come out of the other side. You should have something that looks like this picture. In case you didn't check before, make sure that you have paired up the right bicep with the right forearm. In other words, you should have a left side bicep with a left hand/forearm or a right side bicep with a right hand/forearm. When you are satisfied, take the elastic cord out of the wire loop but keep it pulled through the arm.
Step 7: Repeat Steps 3 through 6
With the other arm and another piece of string, obviously. You should now have something that looks sort of like this:
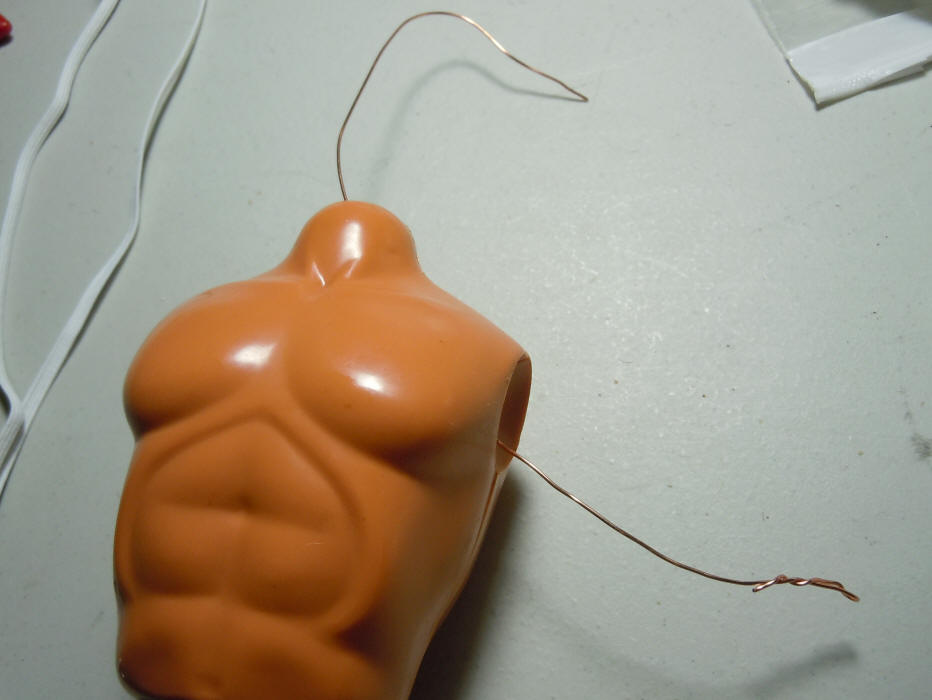
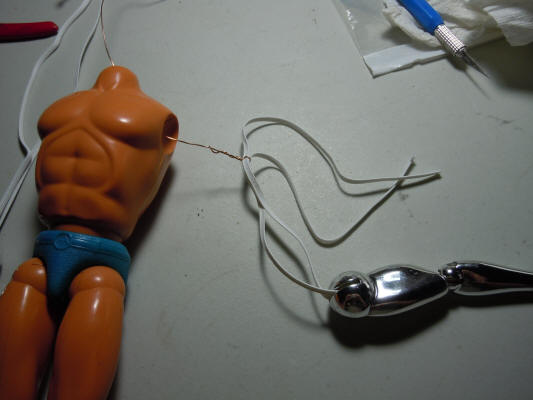
Step 8: Thread the Wire Through the Torso
So, now you have to do some more wire gymnastics. I think it is easier to go in through the neck hole and out through the arm hole, personally. It also helps to bend the wire a bit since you have to curve around to the other hole. Keep at it and when you're done, you should have something like this.
Step 9: Thread the Elastic Through the Torso
Run the elastic cord through the wire loop and then pull the wire loop through the neck hole, pulling the elastic cord into the arm hole and out of the neck. You should start like the left picture and end like the right one.

Step 10: Repeat Steps 8 and 9
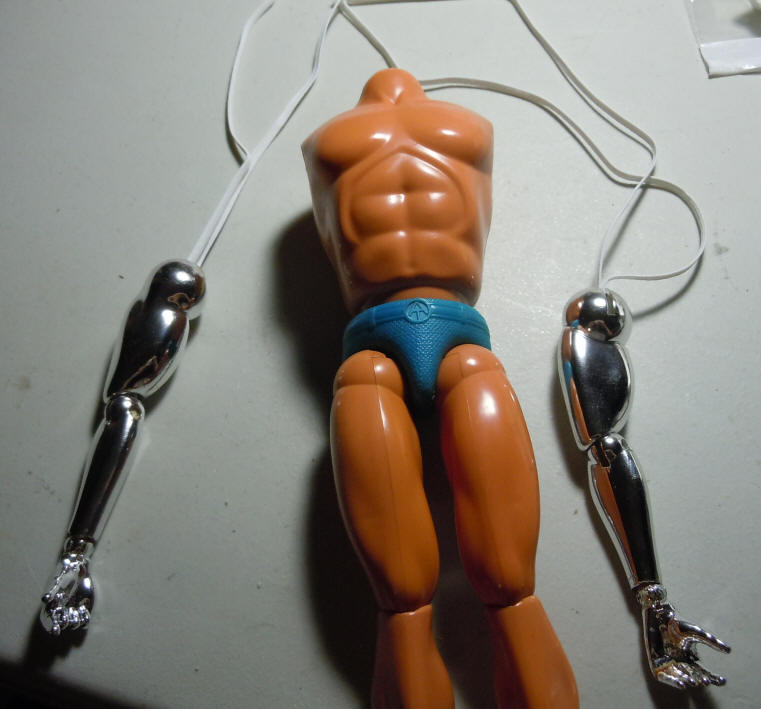
With the other arm, repeat steps 8 and 9. It should end up like the picture below, with four elastic cord ends running through the neck and with the arms to the side.
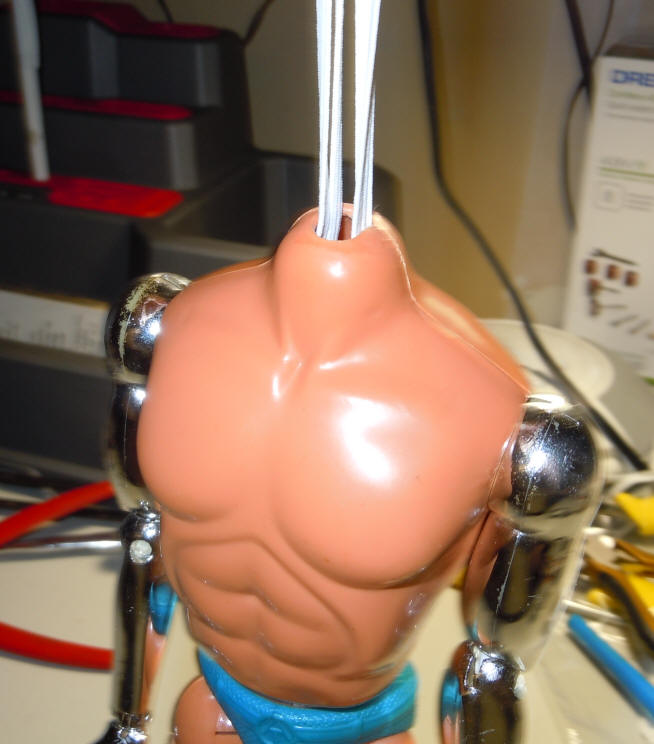
Step 11: Thread the Elastic Through the Neck Post
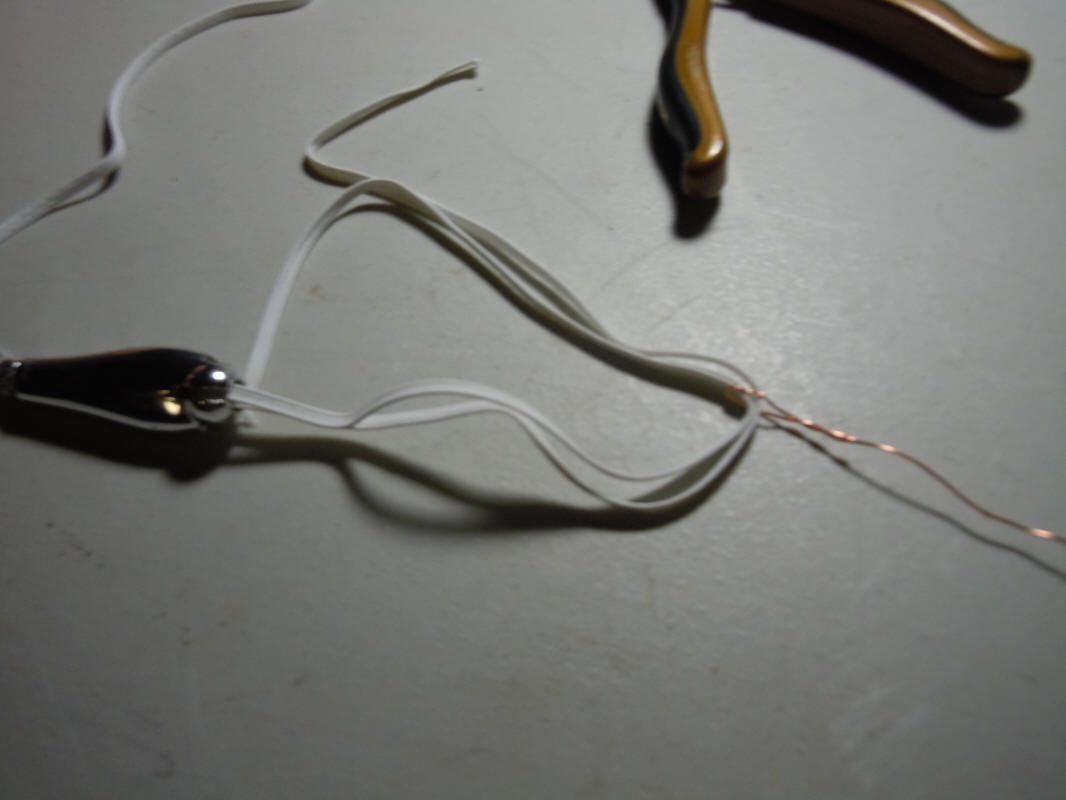
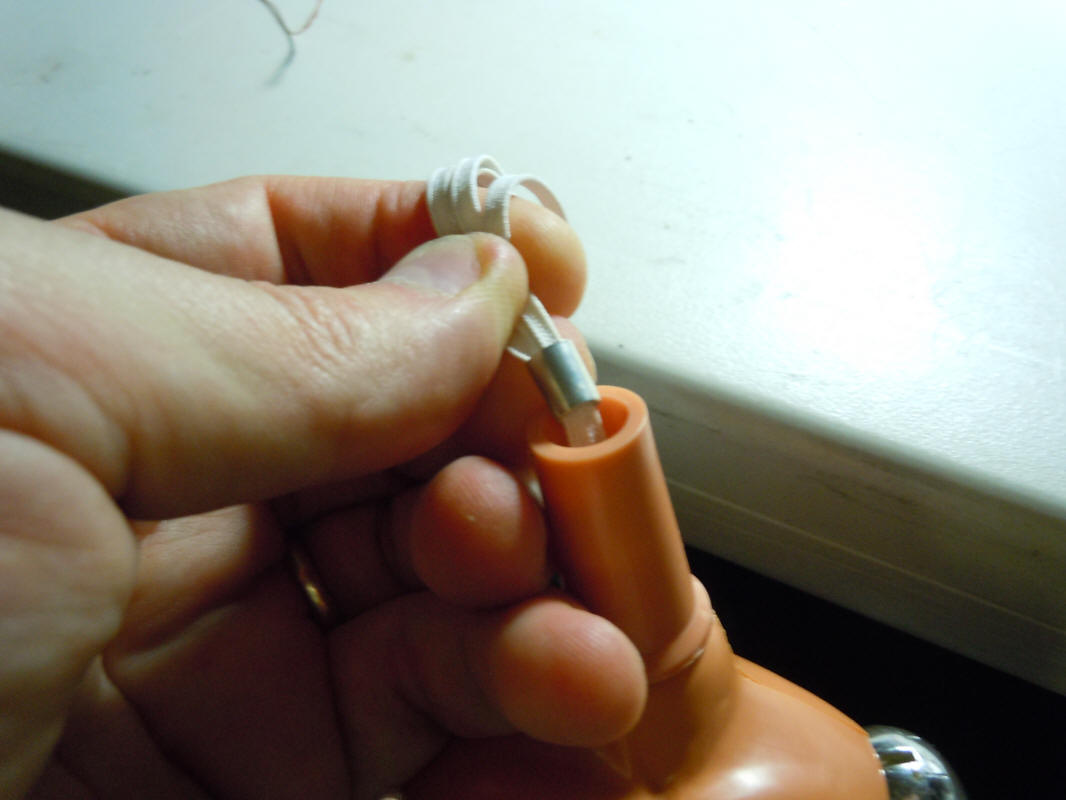
Push all (or alternately half at a time twice) of the elastic cord ends through the wire loop. Press the free end of the wire loop through the neck hole, as shown on the left and then pull all four elastic cords through the neck post so you have what is on the right. You now have a loop of elastic over each forearm rivet, run through a bicep piece, through the figure's torso, out the neck hole, and through the neck post.
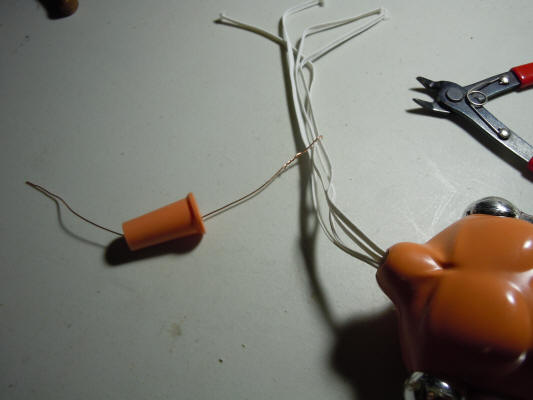
Step 12: Thread the Elastic Through Your Chosen Crimp
Keeping the elastic through the wire loop, pull all of the elastic cords through whatever you plan on crimping. In the picture I have the large wire crimp caps that I cut the plastic off of, leaving a nice metal ring.
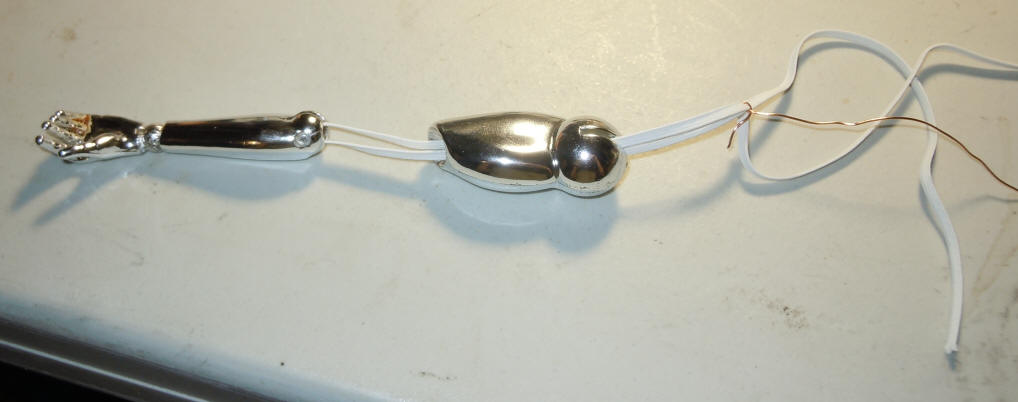
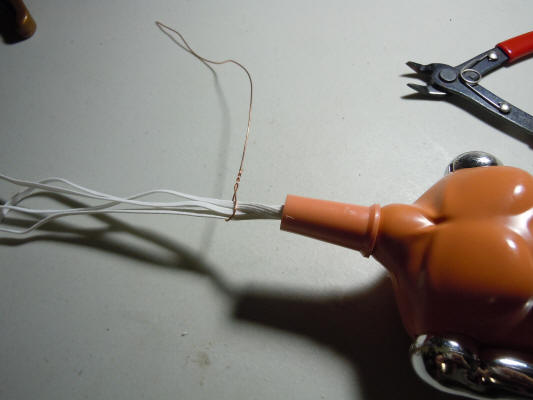
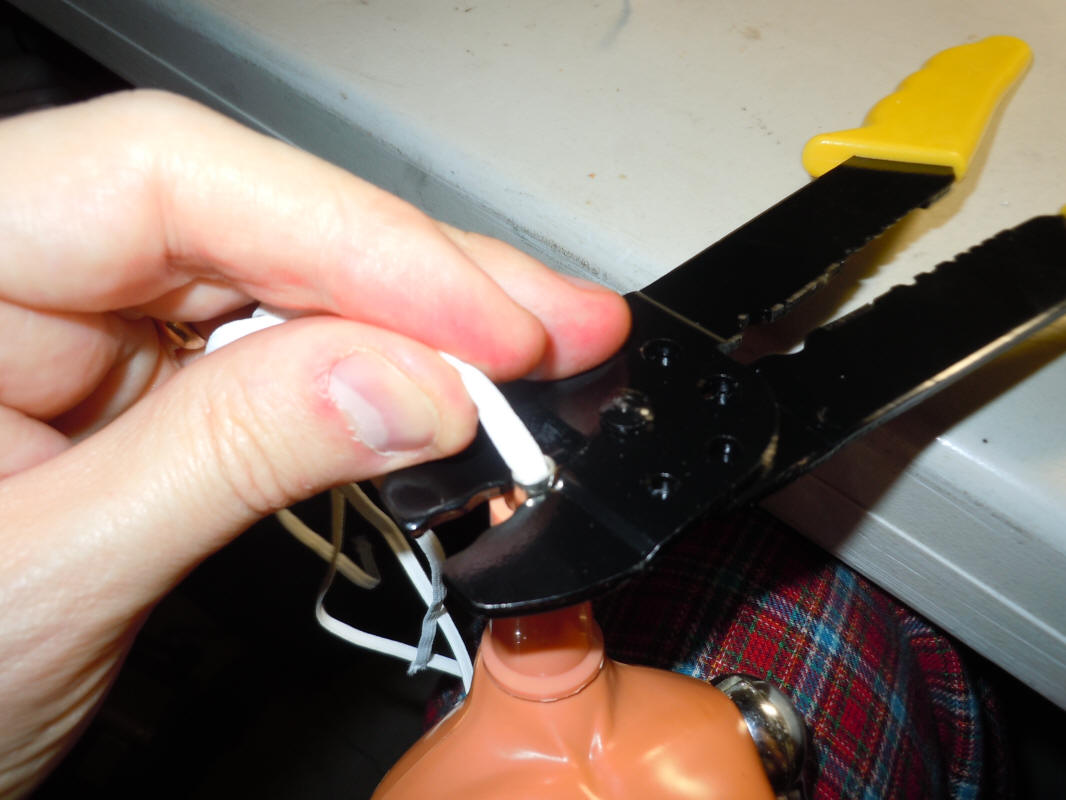
Step 13: Prepare to Crimp
This can be tricky and if you can get help, now is the time to do it. It doesn't take much skilled help, just one or two extra hands. Holding the crimp in the teeth of your crimp tool, start taking all the slack out of all four elastic cords. I suggest tightening them one pair at a time. When you have them tightly pulled through, keeping the crimp as low on the neck post as you can, crimp the metal ring over your elastic cords.
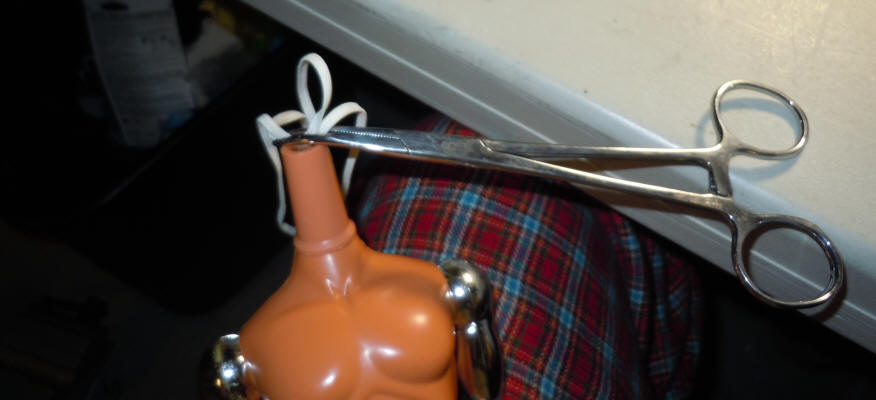
Step 14: Tie a Safety Knot
I use the clamp/hemostat at this point to maintain the tension above the crimp. I then tie a couple of overhand knots just to make sure I never have any slipping of elastic through the crimped metal. You don't want a big knot, so tie it as tight as you can.
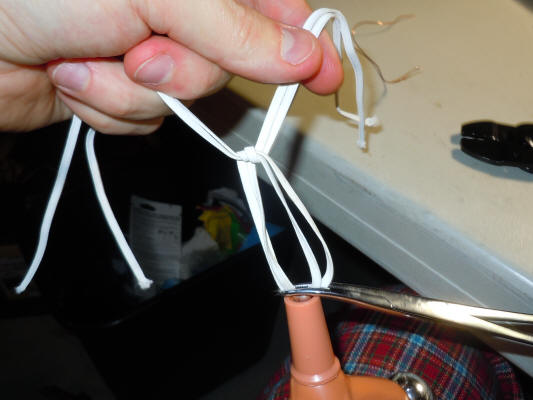
Step 15: Enjoy Victory
You're essentially done. All you have to do is make sure that your arms are attached correctly and then trip the elastic just above the knots, making sure you don't have much excess since his head doesn't have a lot of extra room on top.

Step 16: Reattach Head
Press Joe's head over the neck post until it snaps down over the base of the neck post. If it is hard to do, you can heat up the head slightly with a hair dryer and it'll slide over easier.
Step 17: Put Some Clothes On Him!
Dress him up in your favorite outfit and put him into action!
I hope it helped. If you have any questions, just drop me a note.
Go Back Home