
Restringing Vintage G.I. Joes
Here is a quick guide to restringing Vintage G.I. Joes. It isn't by any means the only way, just a way that I have found to work well. Here we go on my first real photo story. I'll title it, "My first ever photostory."
If you are looking for help in restringing "muscle body" G.I. Joes, you want to head to this page.
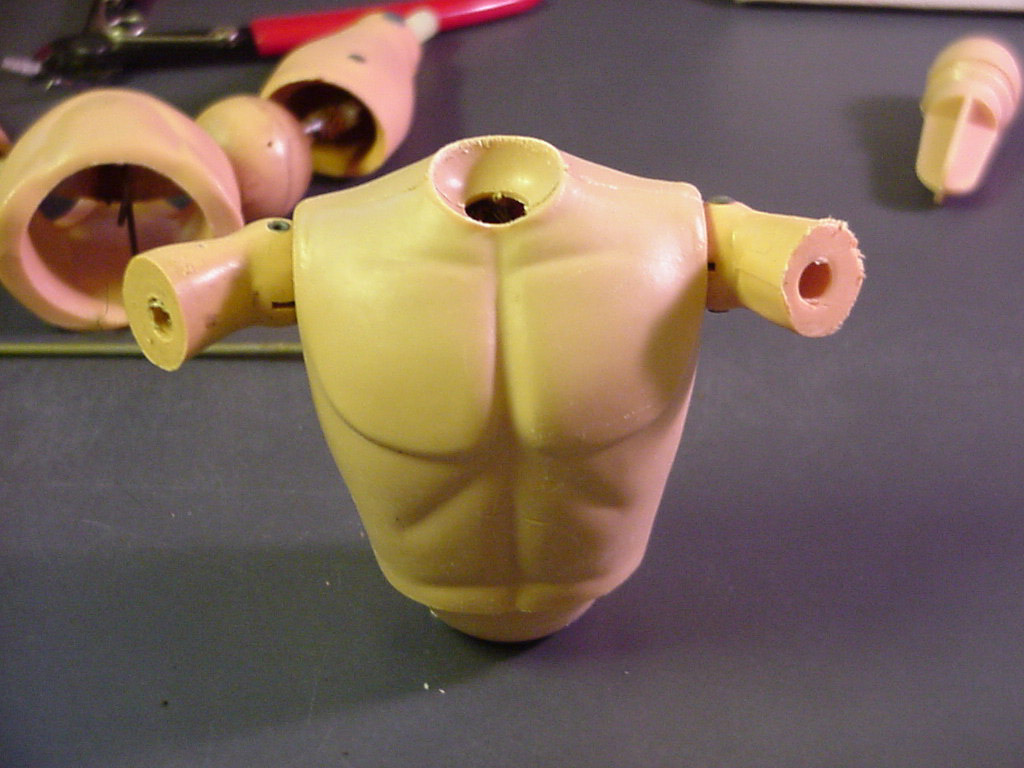
Step 1: Gather Joe Pieces.
This should be pretty easy as he probably fell apart and you are thinking, "now what?" Or, quite possibly you got him in this condition and you are making sure you have what you need. I'm not going to show you all the snap on pieces that just push on....I'm concentrating solely on the pieces that must be restrung to make Joe whole again. Here are the pieces you will need. Two thighs (one left, one right), a butt, a neck post, two thigh balls, a torso, and two shoulder pieces (not shown, one left, one right)
Step 2: Gather your restringing materials
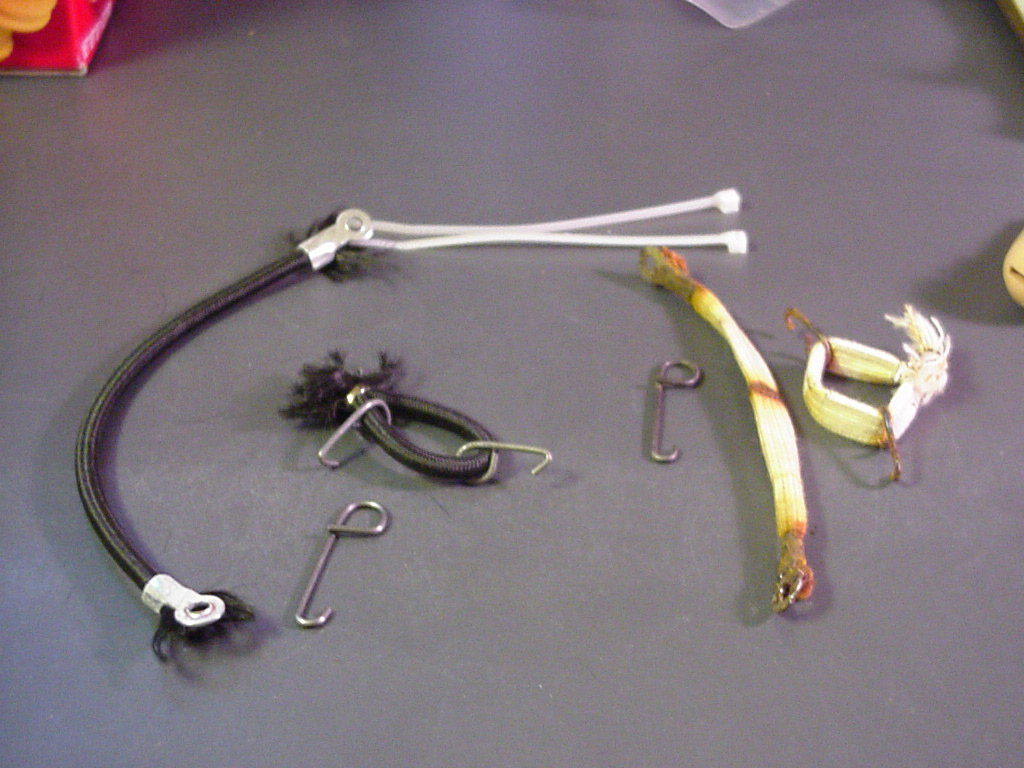
On the left is a Cotswold replacement set and on the right is original vintage equipment. My restringing method does not replace rivets, so if you don't have rivets, stop here and get some. Instead of replacing rivets, I use the small zip ties you see at the top of the picture. This saves me lots of time, effort, and cuts on my hands from screwing with rivets. Okay, you see that both kits have a long piece of elastic with two metal eyelets, a long metal hook, a short loop of elastic, and two small metal hooks. These are the guts of G.I. Joe.
Step 3: Gather your tools
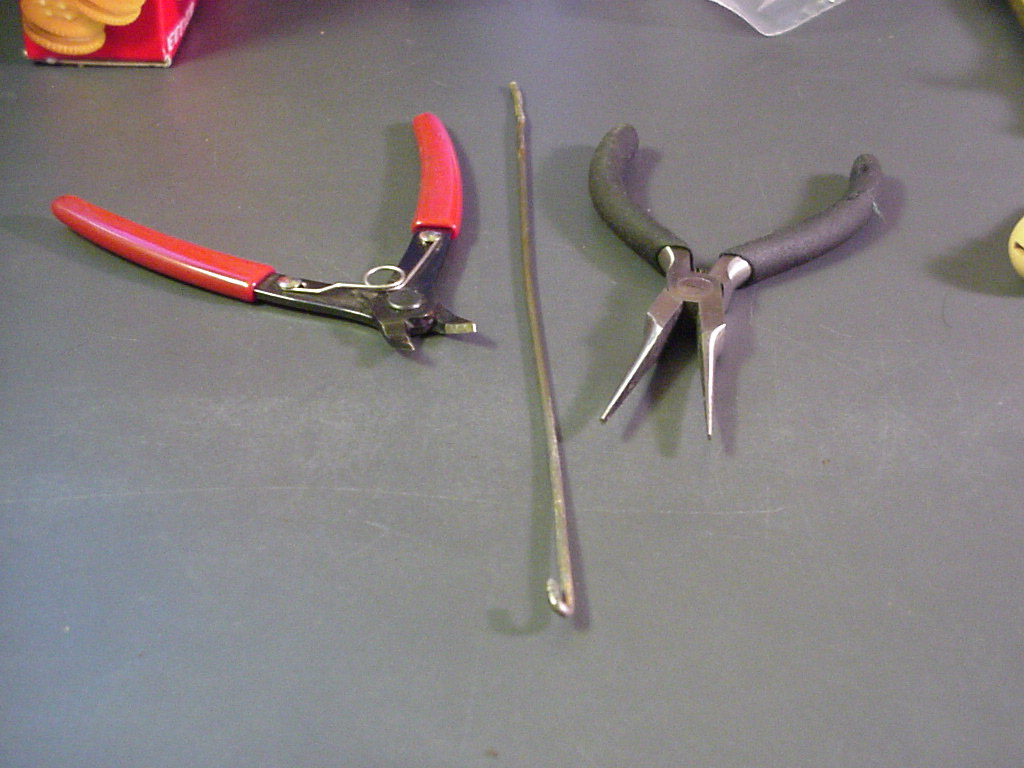
These are optimal tools. The most important is the middle piece. It is a Fabricated Restringing Tool (FaRT). The other two tools are available at any hardware store. For the pliers, long, thin nose ones are the best. I might also suggest GOGGLES and some band-aids. Goggles will protect your eyes if you lose control of a metal hook on a tightly pulled piece of elastic. Band-aids help you not bleed all over Joe if you cut yourself.
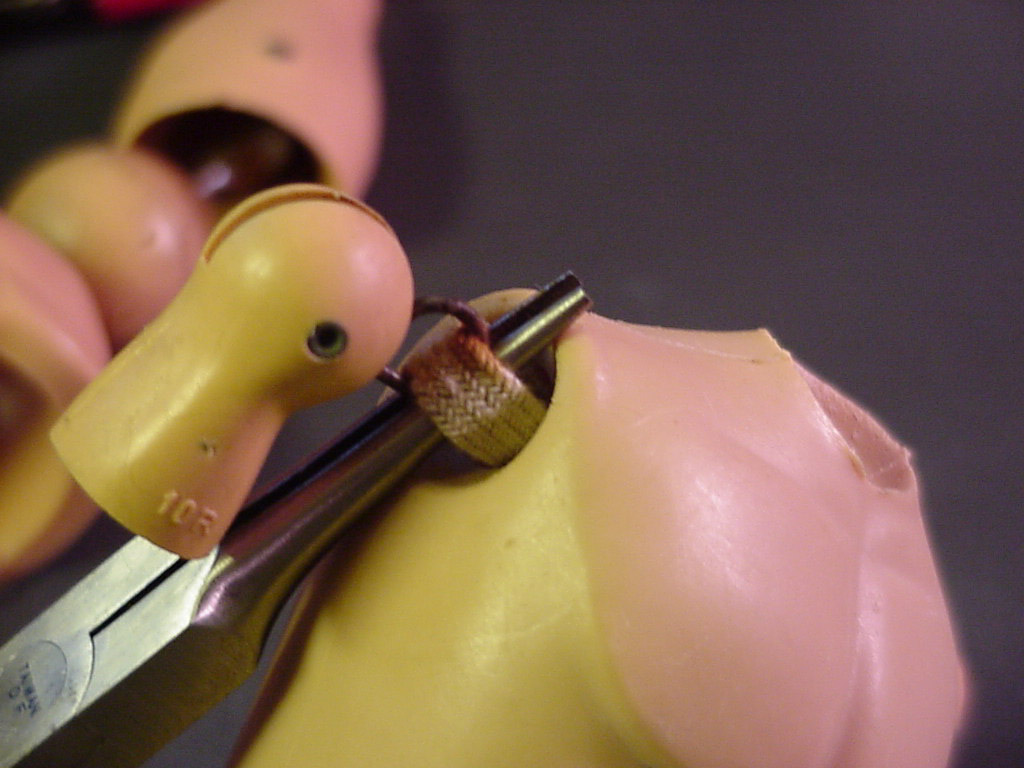
Step 4: Attaching the thighs.
Okay, I owe you a little better focus on this when I redo it. What you are seeing here is the loop on one end of the long elastic piece (metal eyelet) attached to a rivet with the small zip tie. I then use the cutters to cut off the excess zip tie. MAKE SURE YOU PUT THE RIGHT LEG ON THE RIGHT SIDE BEFORE THE NEXT STEP.
Step 5: Threading the lower torso and attaching both thighs
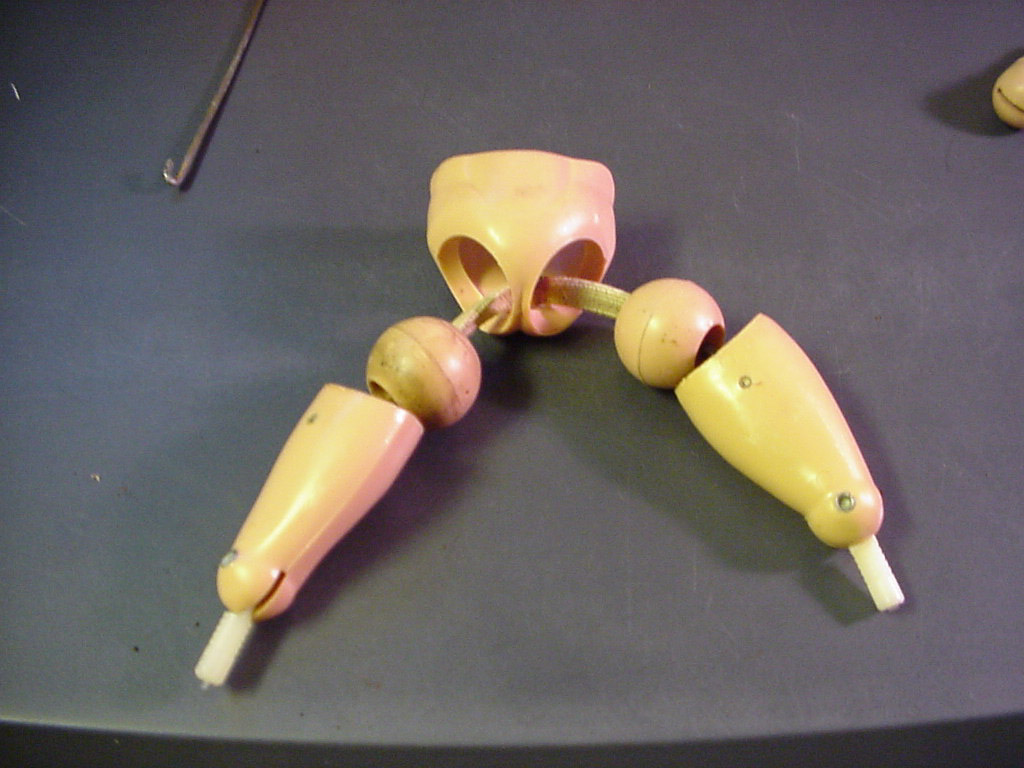
Thread the elastic through the hip ball, through the butt piece (make sure you are on right side based on what thigh you attached first), through the other hip ball, and attach to the other thigh rivet when fully threaded. End result will look like this.
Step 6: Attach head hook
Now, take the long hook (the head hook) and hook the closed end over the middle of the long elastic that you threaded through the lower body. That is it for this step...easy eh?
Step 7: Attach one shoulder
Take one small hook on the elastic loop and hook it on the rivet of one shoulder piece.
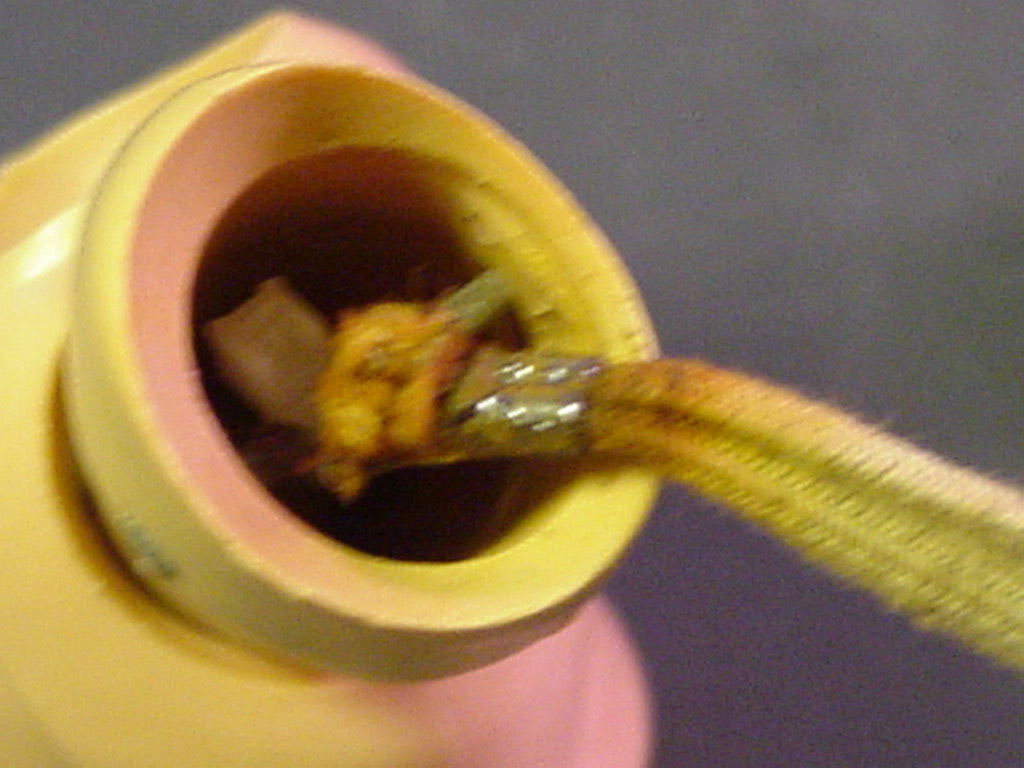
Step 8: Thread the arm loop
Using your FaRT, hook it onto the the hook opposite the one you just attached to a shoulder and use the FaRT to pull that elastic loop through one arm hole, the chest cavity, and out the other side.
Step 9: Secure the far arm hook
This is where you need to clamp the torso in something (I do it between my knees) so you can pull hard on the FaRT. You want to pull the hook all the way through far enough to put the pliers or something similar (screwdriver works) in the elastic loop and keep the hook outside of the body. This allows you to futz around with hooking that little hook over the rivet in the other shoulder. DID I TELL YOU TO MAKE SURE YOU HAD THE RIGHT SHOULDER ON THE RIGHT SIDE? IF NOT, SWITCH NOW BEFORE YOU HAVE TO TAKE IT APART.
Step 10: Attach other shoulder
Using the pliers like I told you helps. Notice how the 10R (for right) shoulder is on the figure's right side. This is important..trust me. Just hook that hook into the shoulder and when it is securely hooked to the rivet, pull on the shoulder and remove the pliers. It should look like the next step.
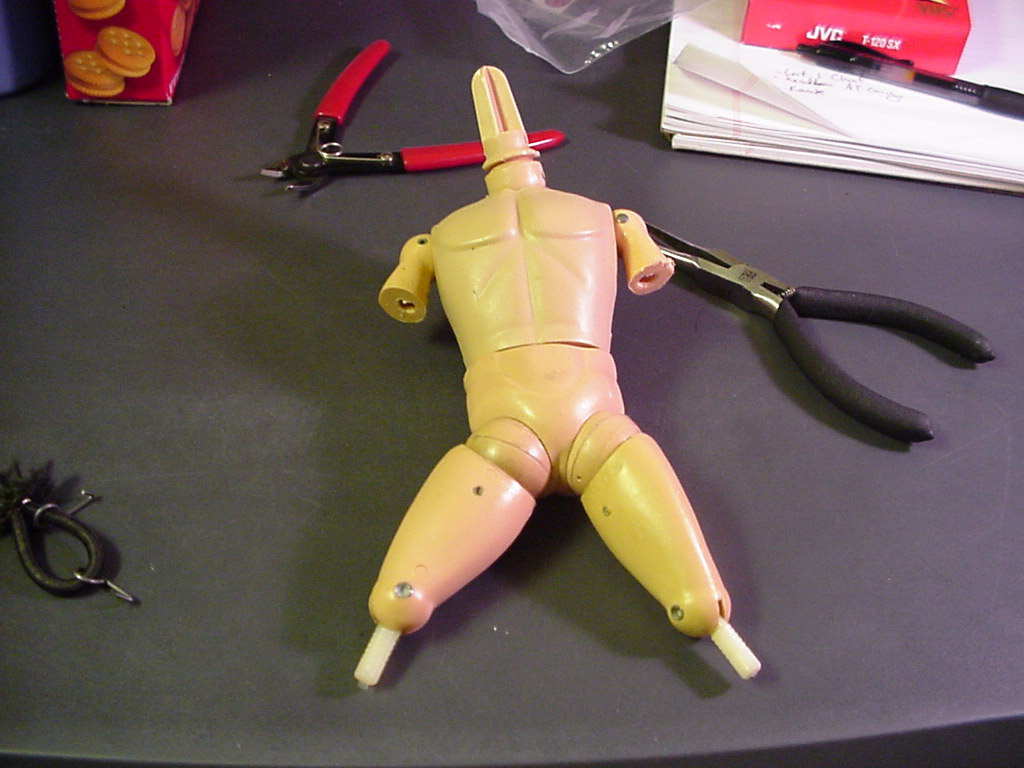
Step 11: Admire your work, take a break
If you haven't lost an eye yet, you are doing well. Notice how he now has a complete lower body and a complete upper body...how can we get the two together...well, here is the answer....
Step 12: Thread the long hook through the chest.
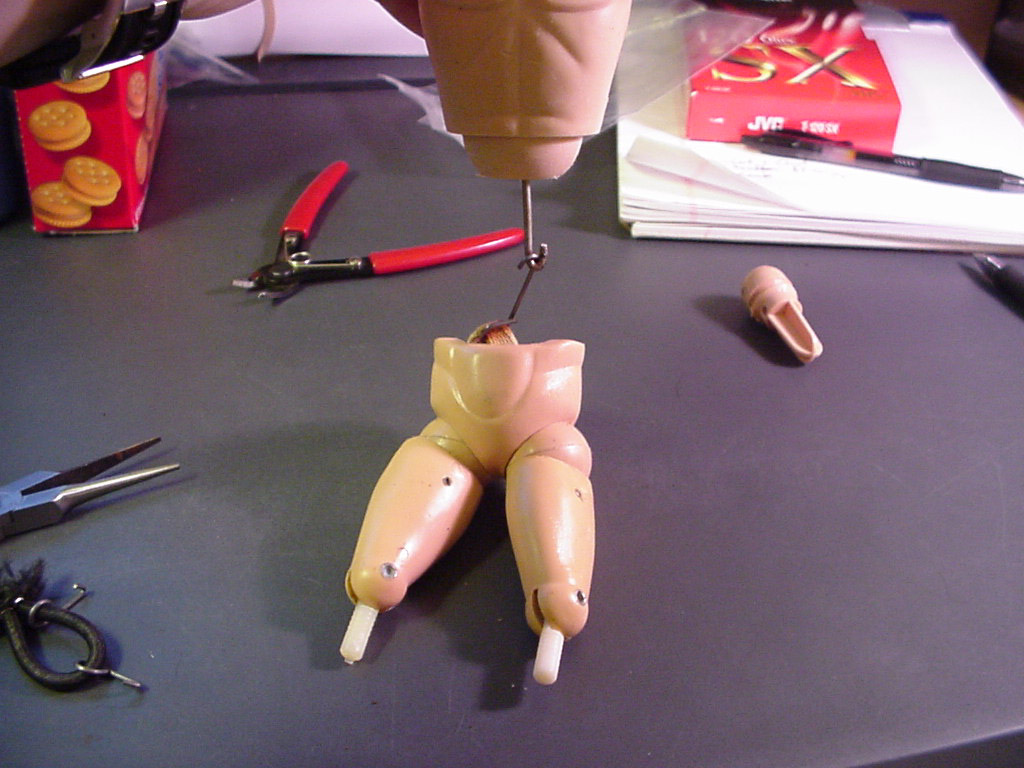
Run the FaRT through the neck hole and out the bottom of the chest where you will hook it to the long hook of the lower body.
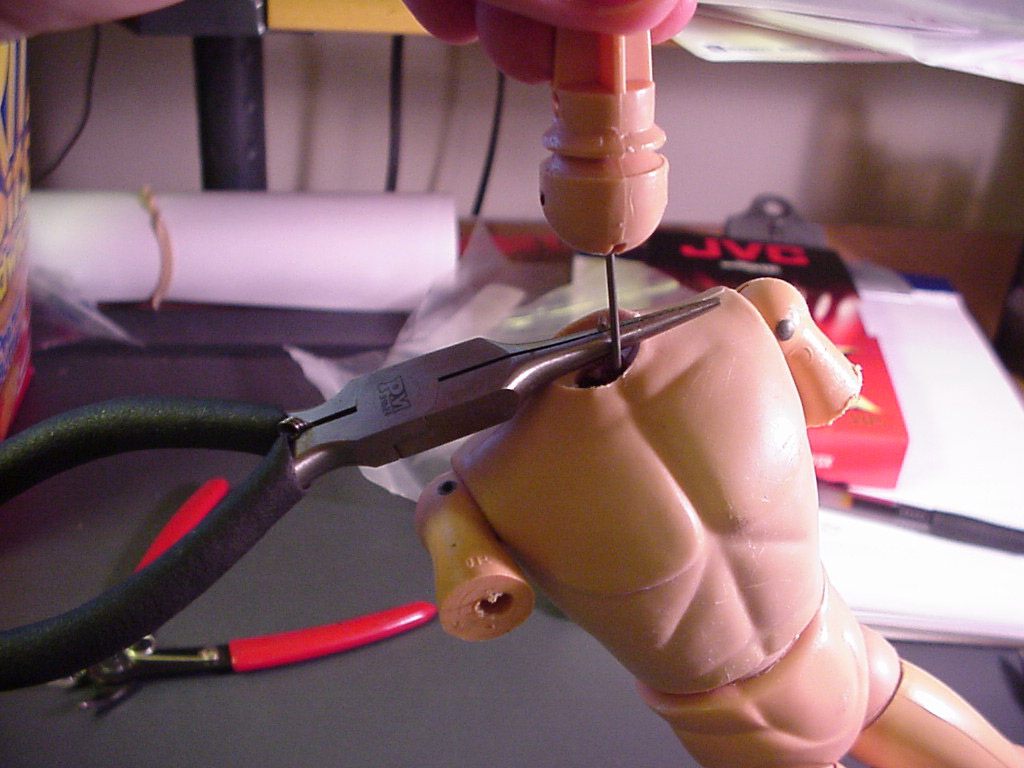
Step 13: Heave Hoh
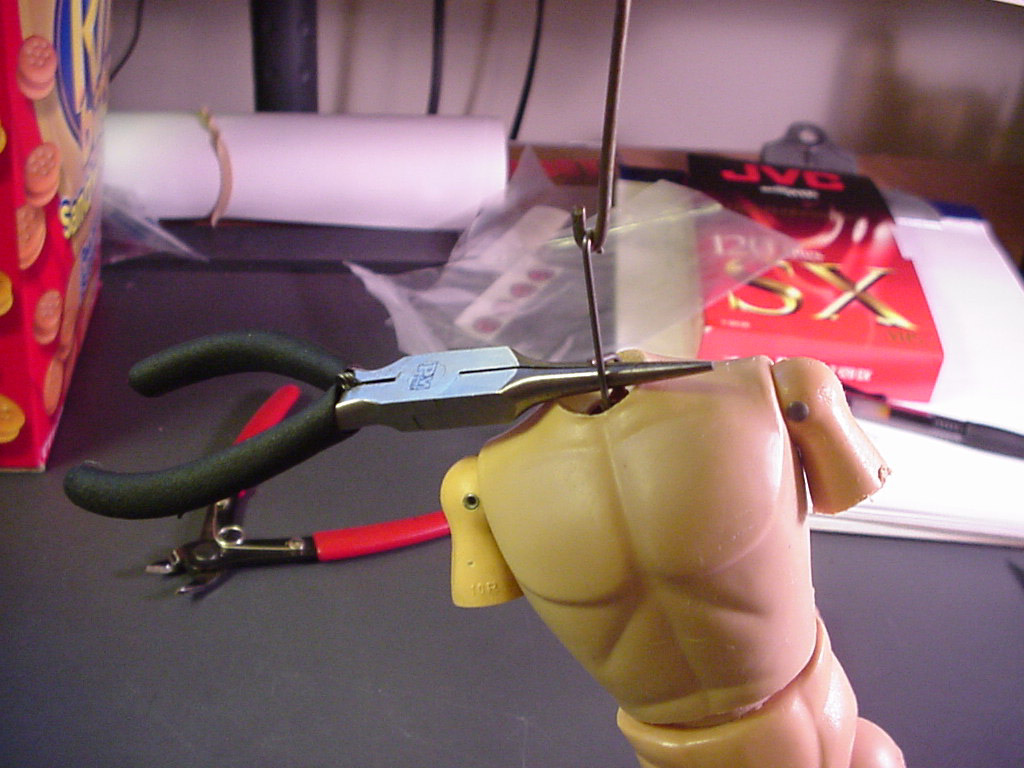
Carefully wedge the upper body with something so you can get a good tug on the FaRT. You need to pull hard so that you can clear the neck hole with the closed loop of the long hook and stick your pliers or a similar implement in there. Then, and only then, can you release tension on the FaRT. Otherwise, that thing could go flying and hurt you or someone else.
Step 14: Add neckpost
Hook the long hook onto the rivet in the neckpost. Pull firmly on the neckpost in an upward direction, remove the pliers (or similar item), and gently allow the head to settle into the neck hole.
Step 15:
Find someone to high-five you, call your dad, do something to get some credit. You just restored life to a toy that is about 30 years old...that might be older than you are. You are a miracle worker. Pat yourself on the back...this is what you should have now.
Just add the calves, feet, biceps, forearms, hands, and head and he should be just fine. Congrats on a job well-done. Oh, be sure to clean up if you are married, or you will get fussed at.

Go Back Home